REQUIREMENTS
1 - Java SE Development Kit (JDK) 6 Update 11
Download Java SE 6
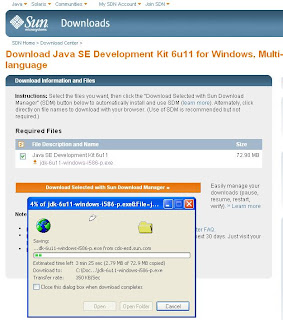
To install Java double click on the executable jdk-6u11-windows-i586.exe and follow the wizard instructions.
2 - Apache Tomcat 6.0.18
Tomcat is needed to deploy and run your RichFaces web application.
Download Tomcat 6.0.18
To install Tomcat, double click on the apache-tomcat-6.0.18.exe and follow the wizard instructions. You need to use the Java 6 home in the 'Java Virtual Machine' page.

3 - Eclipse Enterprise Edition 3.4 Ganymede
Download eclipse-jee-ganymede-SR1-win32
4 - Java Server Faces (JSF) libraries
Download JSF 1.2
5 - Java Standard Tag Library (JSTL) libraries
Download JSTL 1.2
6 - Facelets libraries
Download Facelets 1.1.14
7 - RichFaces libraries
Download RichFaces 3.2.2
8 - Apache Commons libraries
RichFaces needs the following apache commons jars:
Download
commons-beanutils-1.7.0
commons-collections-3.2
commons-digester-1.8
commons-logging-1.1.1
EXTRATING THE ZIP FILES
Extract all the zip files to any directory (My extract directory C:\canjur\downloads).
Iam going to refer this directory (C:\canjur\downloads) as your DOWNLOADS_EXTRACT_HOME hereafter.

LAUNCH ECLIPSE & CREATE WORKSPACE
Step 1:
Go to <your eclipse home>\eclipse & Launch eclipse enterprise edition (eclipse.exe)
Step 2:
Create a workspace. Say C:\workspace-jee\richfaces-demo-1

SETUP ECLIPSE FOR RICHFACES DEVELOPMENT
Step 3:
In eclipse, go to Window->Preferences and choose Web->JavaServer Faces Tools->Libraries

Step 4:
You need to define the following new JSF libraries which is needed to create a JSF 1.2 with RichFaces web application
- SUN_RI_1.2
- JSTL
- FACELETS
- RICHFACES
- COMMONS
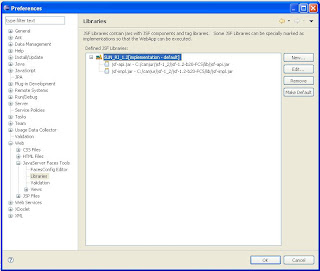
SUN-RI-1.2
Click 'New ...' in the 'Libraries' page. Input the following :
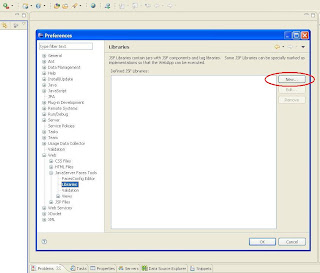
Library Name: SUN-RI-1.2
Version Supported: v1_2

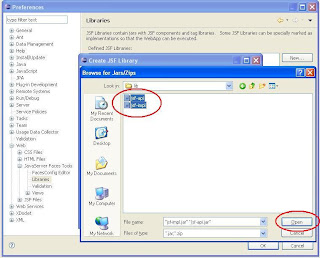
Click 'Add' under 'Library Jars'. The Browser for Jars/Zips pops up.
Go to your <DOWNLOADS_EXTRACT_HOME>\jsf-1_2\jsf-1.2-b20-FCS\lib (in my machine it is C:\canjur\jsf-1_2\jsf-1.2-b20-FCS\lib).
Select jsf-api.jar & jsf-impl.jar and click 'Open'.
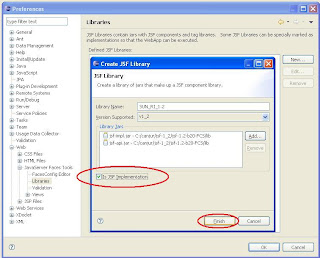
 Check 'Is JSF Implementation' in the Create JSF Library popup and click 'Finish'.
JSTL
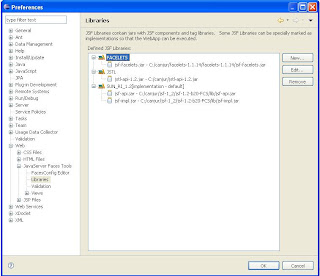
Repeat the same steps listed under SUN-RI-1.2 to add the JSTL library.
Note: Do not Check the 'Is JSF Implementation' for JSTL.
Library Name : JSTL
Version Supported : v1_2
Jar Location : <DOWNLOADS_EXTRACT_HOME>
Jar Name(s) : jstl-api-1.2.jar

FACELETS
Repeat the same steps listed under SUN-RI-1.2 to add the FACELETS library.
Note: Do not Check the 'Is JSF Implementation' for FACELETS.
Library Name : FACELETS
Version Supported : v1_2
Jar Location : <DOWNLOADS_EXTRACT_HOME>\facelets-1.1.14\facelets-1.1.14
Jar Name(s) : jsf-facelets.jar
RICHFACES
Repeat the same steps listed under SUN-RI-1.2 to add the RICHFACES library.
Note: Do not Check the 'Is JSF Implementation' for RICHFACES.
Library Name : RICHFACES
Version Supported : v1_2
Jar Location :
<DOWNLOADS_EXTRACT_HOME>\richfaces-ui-3.2.2.SR1-bin\richfaces-ui-3.2.2.SR1\lib
Jar Name(s) :
richfaces-api-3.2.2.SR1.jar
richfaces-ui-3.2.2.SR1.jar
richfaces-impl-3.2.2.SR1.jar
 COMMONS
Repeat the same steps listed under SUN-RI-1.2 to add the COMMONS library.
Note: Do not Check the 'Is JSF Implementation' for COMMONS.
Library Name : COMMONS
Version Supported : v1_2
Jar Location :
<DOWNLOADS_EXTRACT_HOME> (for commons-beanutils-1.7.0.jar)
<DOWNLOADS_EXTRACT_HOME>\commons-collections-3.2\commons-collections-3.2
<DOWNLOADS_EXTRACT_HOME>\commons-digester-1.8\commons-digester-1.8
<DOWNLOADS_EXTRACT_HOME>\commons-logging-1.1.1-bin\commons-logging-1.1.1
Jar Name(s) :
commons-beanutils-1.7.0.jar
commons-collections-3.2.jar
commons-digester-1.8.jar
commons-logging-1.1.1.jar
Finally, Click OK button in the Preferences->Web->JavaServer Faces Tools popup.
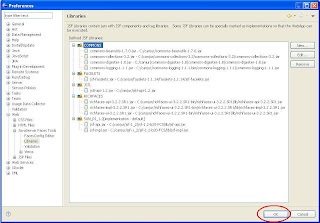
You are ready to create a RichFaces web application. Lets rock !
RICHFACES WEB APPLICATION
Step 5:
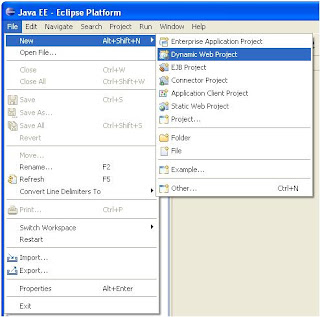
Create a new Dynamic Web Project in eclipse.
Click File->New->Dynamic Web Project
Project Name : RichFaces
Target Runtime :
Dynamic Web Module Version : 2.5
Configuration : JavaServer Faces v1.2 Project
 Click Next.
 Click Next.
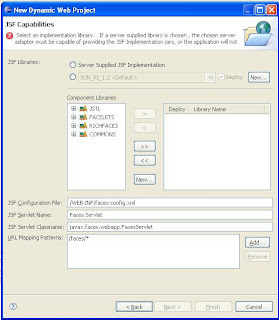
Choose SUN_RI_1.2 under JSF Libraries: Add all the Component Libraries to Deploy (click >>) Remove /faces/* from URL Mapping Patterns and add *.jsf
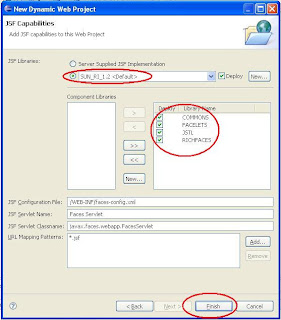
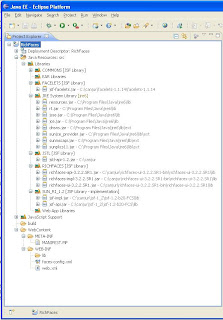
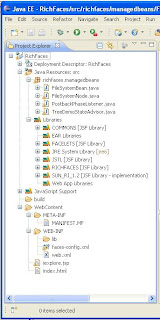
Click 'Finish'. You will see the project tree similar to the one shown in the picture below.
RICHFACES CONFIGURATION FILES
Step 6:
Edit your RichFaces->WebContent->WEB-INF web.xml & faces-config.xml, go to src tab and type the contents shown in the images below:
web.xml (Iam not able to properly indend & color the XML file hence the picture. If you need the XML files write to me. I will mail it to you)
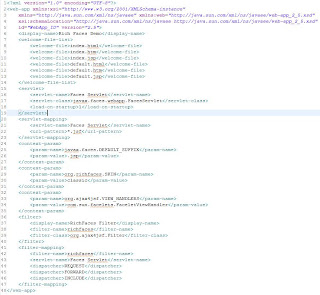 faces-config.xml (Iam not able to properly indend & color the XML file hence the picture. If you need the XML files write to me. I will mail it to you)
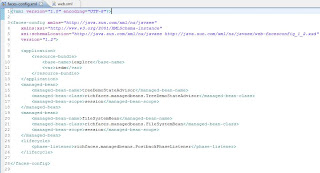 Save your web.xml & faces-config.xml.
INDEX & JSP FILES
Step 7:
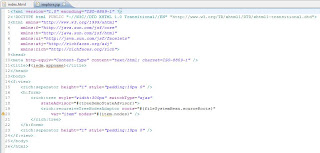
Create index.html & iexplore.jsp under RichFaces->WebContent and copy paste the contents below.
index.html
 iexplore.jsp
  JAVA SRC FILES (JSF MANAGED BEANS)
Step 8:
Right click 'Java Resources: src' in you project tree and select New->Package to create a package called richfaces.managedbeans.
Create Java files named
FileSystemBean.java FileSystemNode.java PostbackPhaseListener.java TreeDemoStateAdvisor.java
http://jsfunit.demo.jboss.com/jboss-jsfunit-examples-richfaces/richfaces/treeNodesAdaptor.jsf?c=recursiveTreeNodesAdaptor
In case you are not seeing the files under the abover URL, then navigate to
http://jsfunit.demo.jboss.com/jboss-jsfunit-examples-richfaces/ Click RichTrees in the Left panel bar Click Recursive Tree Adaptor
All the java files has package name as package org.richfaces.treemodeladaptor. Change it to 'richfaces.managedbeans'. Open FileSystemBean.java and change the line private static String SRC_PATH = "/WEB-INF/src";
JAVA PROPERTIES FILE
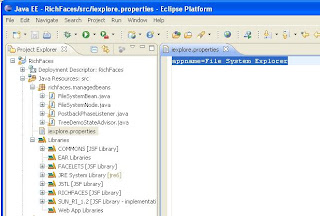
We are going to create a properties file called iexplore.properties under your RichFaces->Java Resources:src.
Step 9:
Right click Java Resources:src and choose New->Other. Choose General->File and click Next.
 Select RichFaces->src folder. Input 'iexplore.properties' for the File name and click Finish.
 Open iexplore.properties, copy & paste the following line in the editor and save the file.
appname=File System Explorer
RUNNING THE RICHFACES WEB APPLICATION
Lets run our RichFaces web application. Before we run you should know what the application is going to display in the browser window inside eclipse.
The index.html is going to navigate to iexplore.jsp file.
The iexplore.jsp is going to read the file structure under your deployed web application WEB-INF and display it using the RichFaces <rich:tree> and <rich:recursivetreenodesadaptor> components.
This application may sound too much for a beginer, but once you get it up and running you will learn everything you want to build a sophisticated RichFaces web application. That is my motto !
Step 10:
Right click on RichFaces->WebContent->index.html and select Run As->Run on Server
 Under 'Select the server type' choose 'Tomcat v6.0 Server' and click Next.
 Click on 'Browse' button under 'Tomcat installation directory'.
Choose you
 Click Next. The wizard should look like the one shown below.
 Click 'Finish'. Eclipse will start the tomcat server and deploy your RichFaces web application.
You should see the following in the eclipse browser.
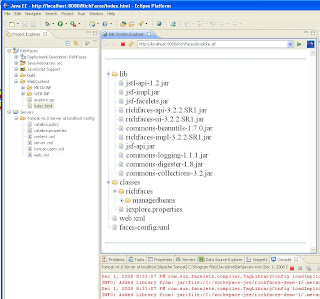
CONGRATULATIONS ! You have learned all the technologies needed to develop RichFaces/JSF web applications.
2 comments:
Hello Anjur,
I got some problems when I start-up the JBoss,
could you provide these files: web.xml & faces-config.xml to me,
thanks!
my email: andrewko@anet.net.tw
Hey Carl,
Apologies for my delayed response. Hope you got the issue resolved by this time. Btw, I have mailed you the web.xml and faces-config.xml. Let me know if you still has issues. I will try to deploy it in JBoss and let you know the results.
regards!
Post a Comment